 Conventional Gear airplanes provide the option of using two landing techniques. The first is a full stall, or 3 point landing. The airplane is flown close to the ground at ever slower speed until it stalls and settles to the ground. The second, called Wheel Landings are flown a bit differently and just might be discussed next week.
There was nothing special about the weather today. Possibly a scattered layer at 5000, but mostly haze with visibility about 5 miles. Nothing that would keep us on the ground.
Objective of the flight: 3 Point Landings.
I got to the airport a little early for my flight. The owner of the aircraft had the bucket and hose out washing it down. (He warned me not to smash any bugs.) He finished as my instructor arrived and we completed the preflight. Ground procedures were normal (once I remembered to plug in my headset).
The takeoff; this one was actually pretty good. My 'arm chair' flying at home had uncovered a major error with my scan. At the most critical time (raising the tail) I wasn't looking far enough down the runway. I was able to correct this and had pretty good control. Not wanting to allow any drift, I "snatched it" off the ground instead of letting the airplane accelerate and fly off.
We departed to the north to practice some stalls. The nice thing about this airplane is that it really stalls. No mushy, slushy bubbling along, it just sounds the horn breaks clean. I like that. Power on and power off both act pretty much the same.
OK, back to the pattern. I picked up my bearings quicker, but was having a slight problem picking up tower calls. I don't like that. I'll check my batteries to see if I can boost the volume a bit. Traffic was called as base, but was really downwind for runway 9. It turned my pattern into a long straight in. My "arm chair flying" had also uncovered a flaw here. I was flying into the flare too fast. So I really concentrated on speed control as I got into the landing position. It worked well, not great but acceptable. The instructor rode the controls pretty closely and I liked that. That immediate feedback of where the stick should be coupled with the visual cues for nose attitude really gave me the sense of where the plane should be.
The next takeoff went well. I felt very comfortable with the controls and let the airplane fly this time. It felt better. Again traffic pushed us a bit deep on final but it really wasn't a problem. I lined up a bit left but made my corrections. Got on speed and descended to my spot. This was nice. No help from the instructor, this one was mine. And it worked well.
The next takeoff also went well. I'm OK with takeoffs now. Nose position probably needs a bit more fine tuning, but rudder control is no longer a problem. This time the approach was short for traffic, and I carried a bit more speed then I would have liked. A small 'jounce' but under control. I'm learning. The primary objective was met...I had fun.
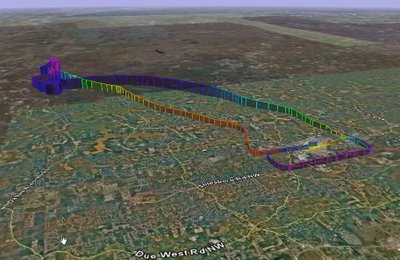
We flew 70.4 miles, climbed to 5738 feet and reached 133 mph over the ground.
8KCAB
Time = 1.2


Dave,
ReplyDeleteHow do you make those gorgeous Google Earth flight tracks?
thanks,
/Bob
Bob, I'm glad you like them. Posting the tracks helps me to remember the flight better, even when it is a relatively simple flight like just T&Gs. I have a Garmin GPSmap 96c that I carry along with me. Once home, MapSource (came with the device) allows me to download the track to my computer. Once the track is saved, you can either go directly to Google Earth, or take an extra step and use www.goflying.org to colorize it for altitude, then go to GE. Another blogger who has helped with tracks can be found at:
ReplyDeletehttp://www.vectorstofinal.com/index.php
Thanks Dave. That helps a lot. I am going to checkout that site.
ReplyDelete